Welcome back to the second part of our movie-themed list app tutorial.
Previously, we built the API call as well as the search bar and list component. Now every time a user selects a film and adds it to their watch list, the film is saved using ‘AsyncStorage’ in order to fill the watch list. If you missed what we worked on last time, make sure to take a look before continuing this tutorial.
In this article, we’ll be saving the movie object within an ‘array’ and sending it to a ‘reducer’, where it’ll then be pushed into a list from the first screen.
Saving the film
Here's where we got up to last time:
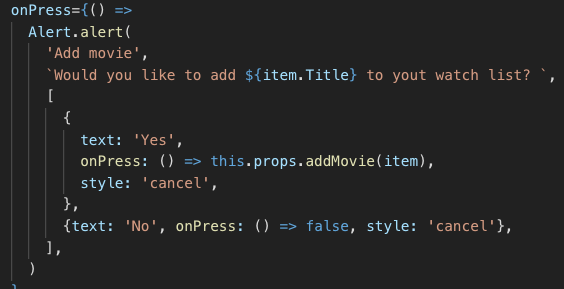
When the user selects a film and chooses ‘yes’, you’ll want to dispatch an action with the film object. To make this happen, open the ‘AppActions.js’ file and edit the ‘addMovie’ function.
Import the ‘AsyncStorage’ from React Native:

Note that ‘AsyncStorage’ is deprecated within the existing React Native library. In the next version, make sure to use the react-native-community library.
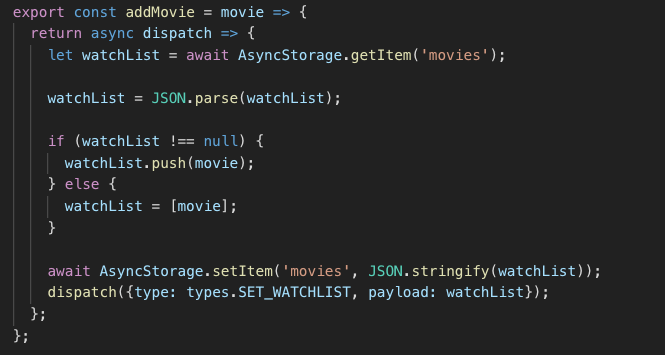
Because this is now an ‘async’ action, it will return an ‘async dispatch’. Recovering the list from the device, the ‘getItem’ option then returns a string which means you’ll need to parse it back. After the parse, make sure to check the recovered object. Is it not null? Push the new film inside and be sure to record it on the device using ‘setItem’. Don’t forget that you’ll always need a string key, so in this instance, call it ‘movies’.
After this, dispatch the action to the reducer. Don’t worry, the app will recover the list when it opens.
The app should now be searching for a film, retrieving the updated list and adding it to your device via ‘AsyncStorage’. The next step? Manage this list by using Redux in Screen01.
Showing the Watch List
It’s now time to work on Screen01. Note that the code to show the list will be almost exactly the same as the code used in Screen02. First, add a ‘renderItem’ function in the class of Screen01:
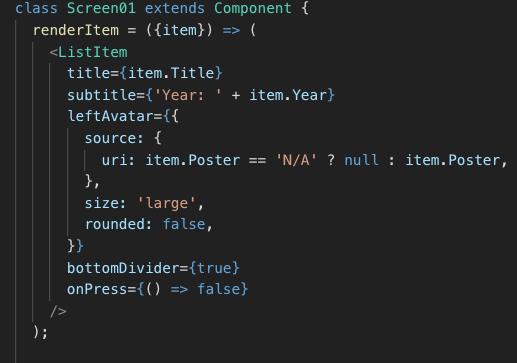
Don’t forget to import the ‘ListItem’ from React Native Elements:

The list will be provided by the reducer, and you already have an array called ‘WatchList’. You’ll need to receive and send props to the class:

Next will be the ‘FlatList’ element:
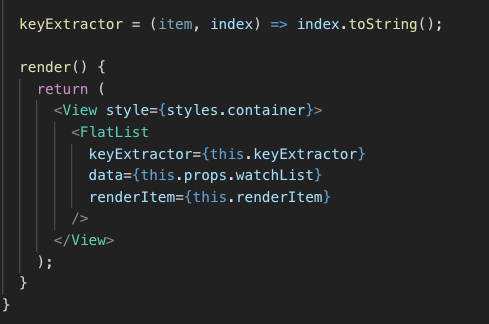
Every time the app starts, you’ll need to get your list from the ‘previously saved’ section in the device. From there, dispatch an action to fill the reducer (remember the reducer will always be the same, and in this case is called ‘SET_WATCHLIST’):
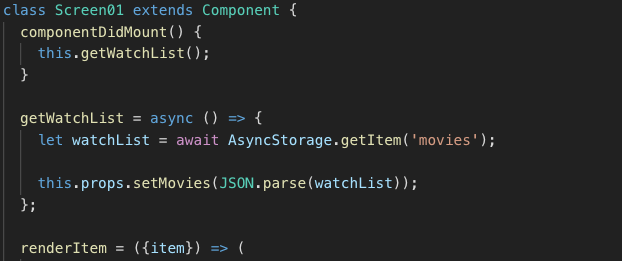
Using the function ‘componentDidMount()’, you’ll call the ‘getWatchList’ (which is an async function). From here, you’ll call ‘setMovies’ from the ‘AppActions.js’ file. Remember that in order to use this function, you’ll need to import it as before, by using the ‘addMovie’ action in ‘Screen02.js’.

Send this by props to the class:
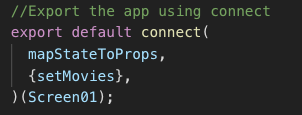
In the ‘AppActions.js’ file, the ‘setMovies’ function is pretty easy to use. You’ll receive an array with the previously set ‘watchList’ and will need to send this to the reducer:

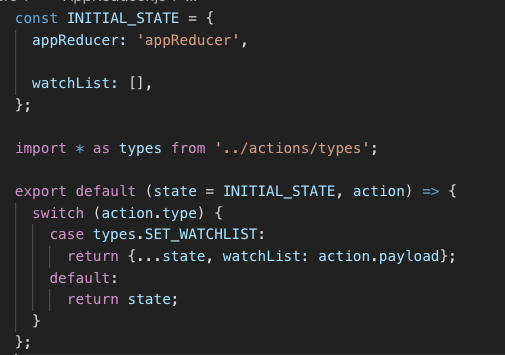
This is how the reducer should look now:
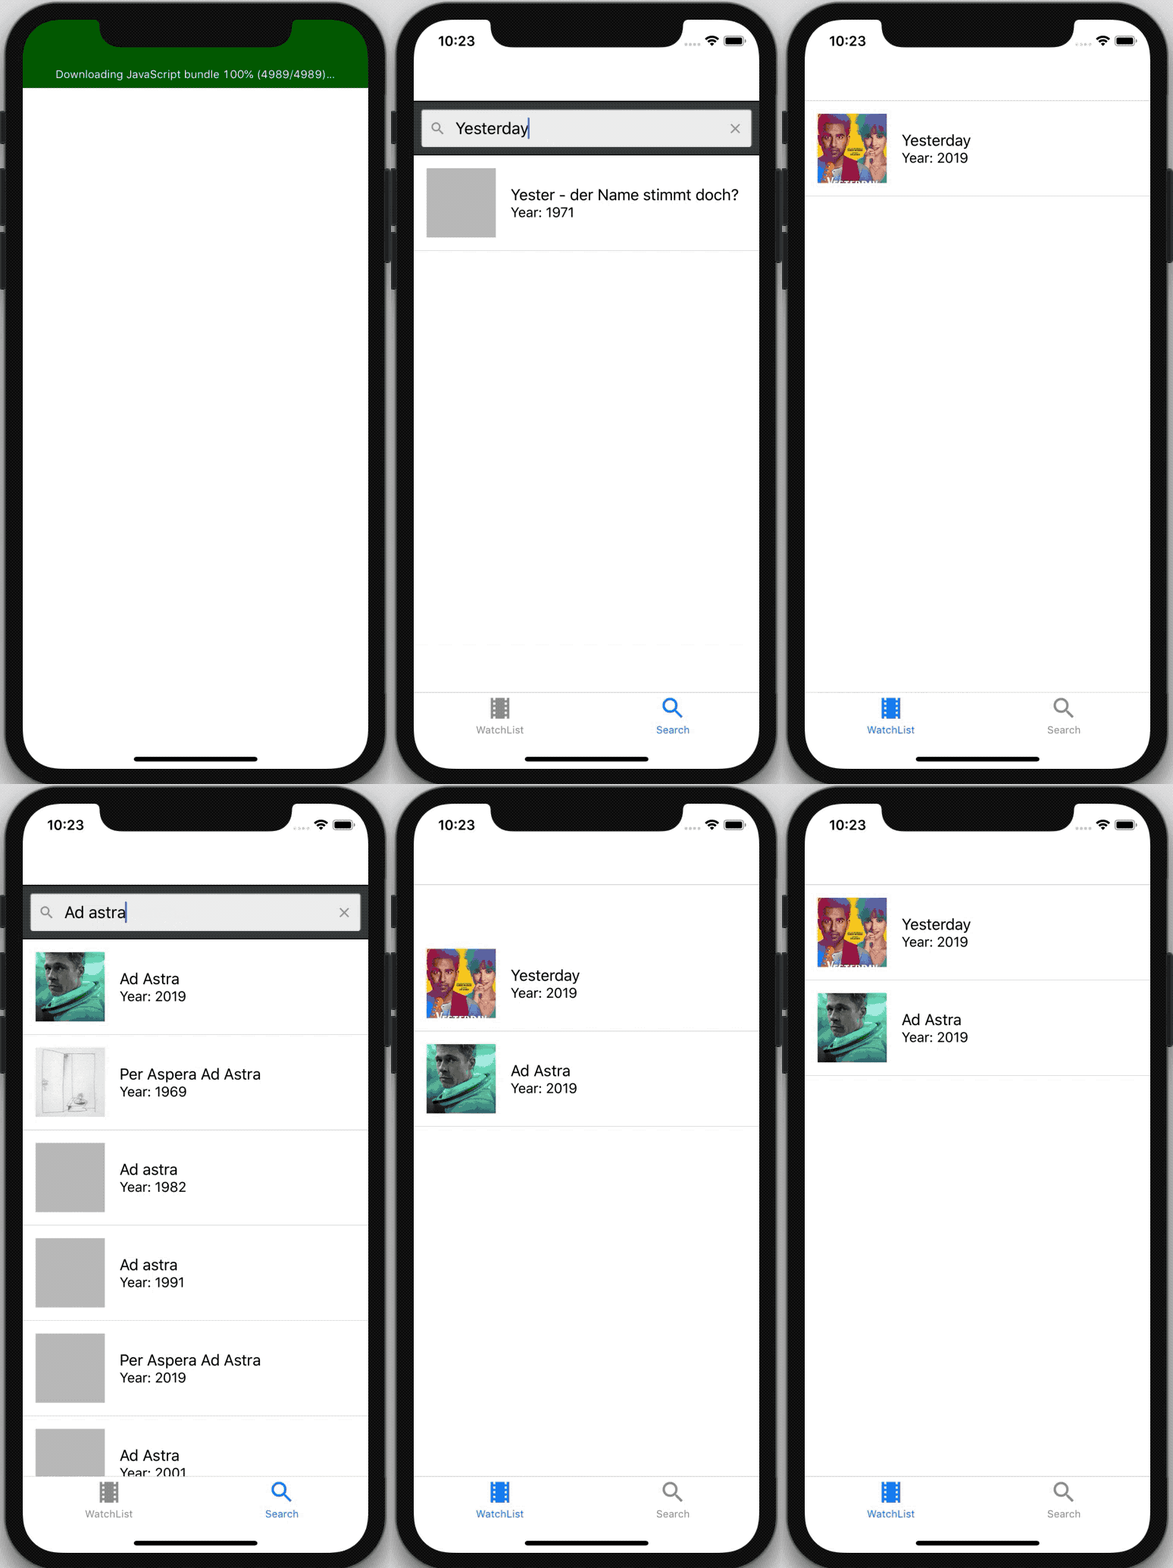
this is how the app should look at this stage:
There are just a few more steps to follow in order to make this app complete. In part three of this tutorial, you’ll be implementing a ‘check’ function for when a film has been watched, as well as a ‘delete’ function for any films that need to be removed from the ‘watch’ list.
Like what you’ve read? Make sure to keep an eye out for part three and in the meantime, check out our previous articles on all-things React Native.


