One way or another, most developers are familiar with modals. There are lots of different ways to use modals in React Native and today, we’re going to be showing you how to use them via the ‘Alert’ component.
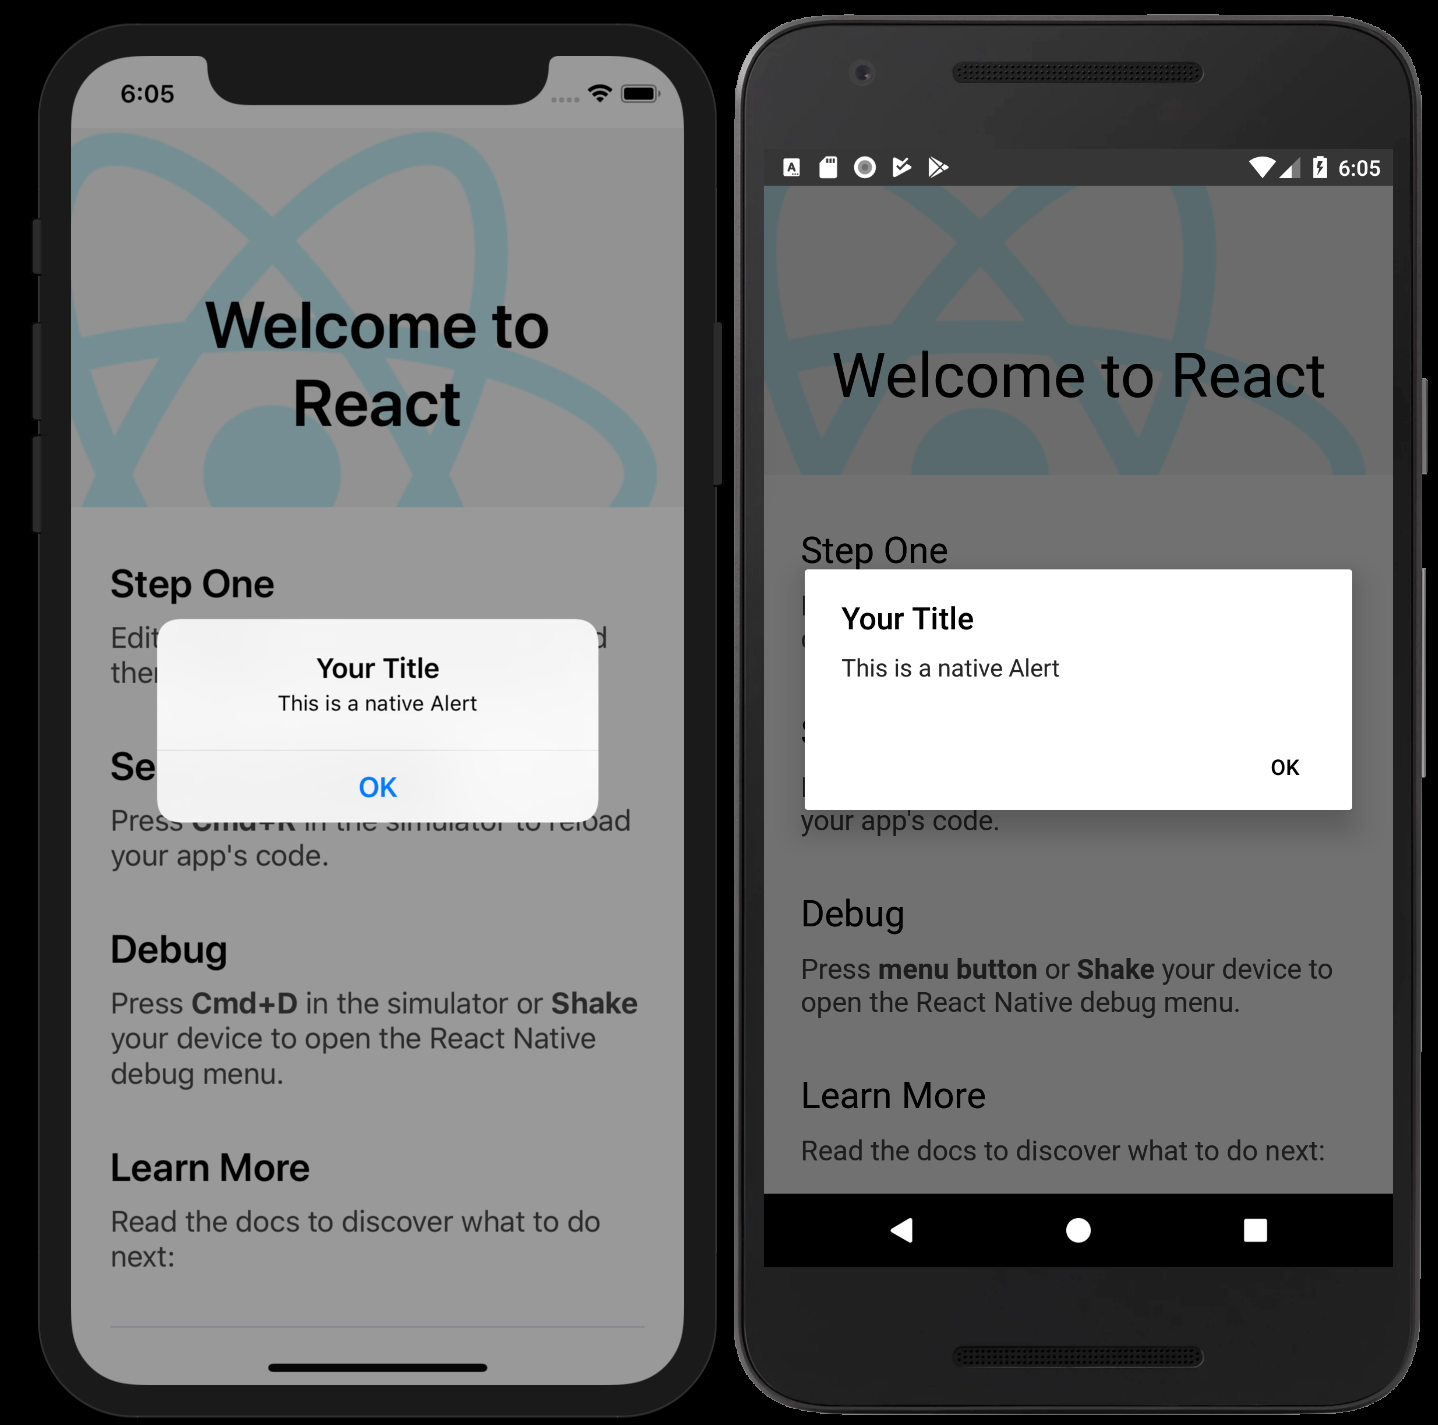
Whether you need to serve some information or present some actions, the ‘Alert’ component will do the job perfectly. Probably one of our favourite components in React Native, ‘Alert’ is simple and renders natively - what more could you ask for?
Before you get started, we recommend taking a look at our other React Native tutorials to see what we’ve been working on so far.
For now, look at the code below:

Sometimes, even if we want to show a simple sentence, we need something more customisable in order to bring it to life; and that’s where modals come in. React Native does have its own modal component, and whilst it’s easy to implement, for this tutorial we’re going to be using the ‘react-native-modal lib’. Both components are very similar, however, the one we’re going to be using allows for more flexibility as well as transitional options.
To start, install the modal lib:
npm install --save react-native-modal
We’re going to create a simple page app with four different buttons. Each of these will show a different type of modal:
- Fullscreen modal with default animation
- Fixed-size modal with ‘fadeIn’ and ‘fadeOut’ animation
- Fixed-size modal with an animation that slides from left to right
- Round modal bouncing from top to bottom
Controlling Modals
When using modals, you’ll need to control their ‘states’ by using props, e.g. ‘true’, to ‘false’, to ‘hide’. Let’s begin by declaring the states on the class constructor:
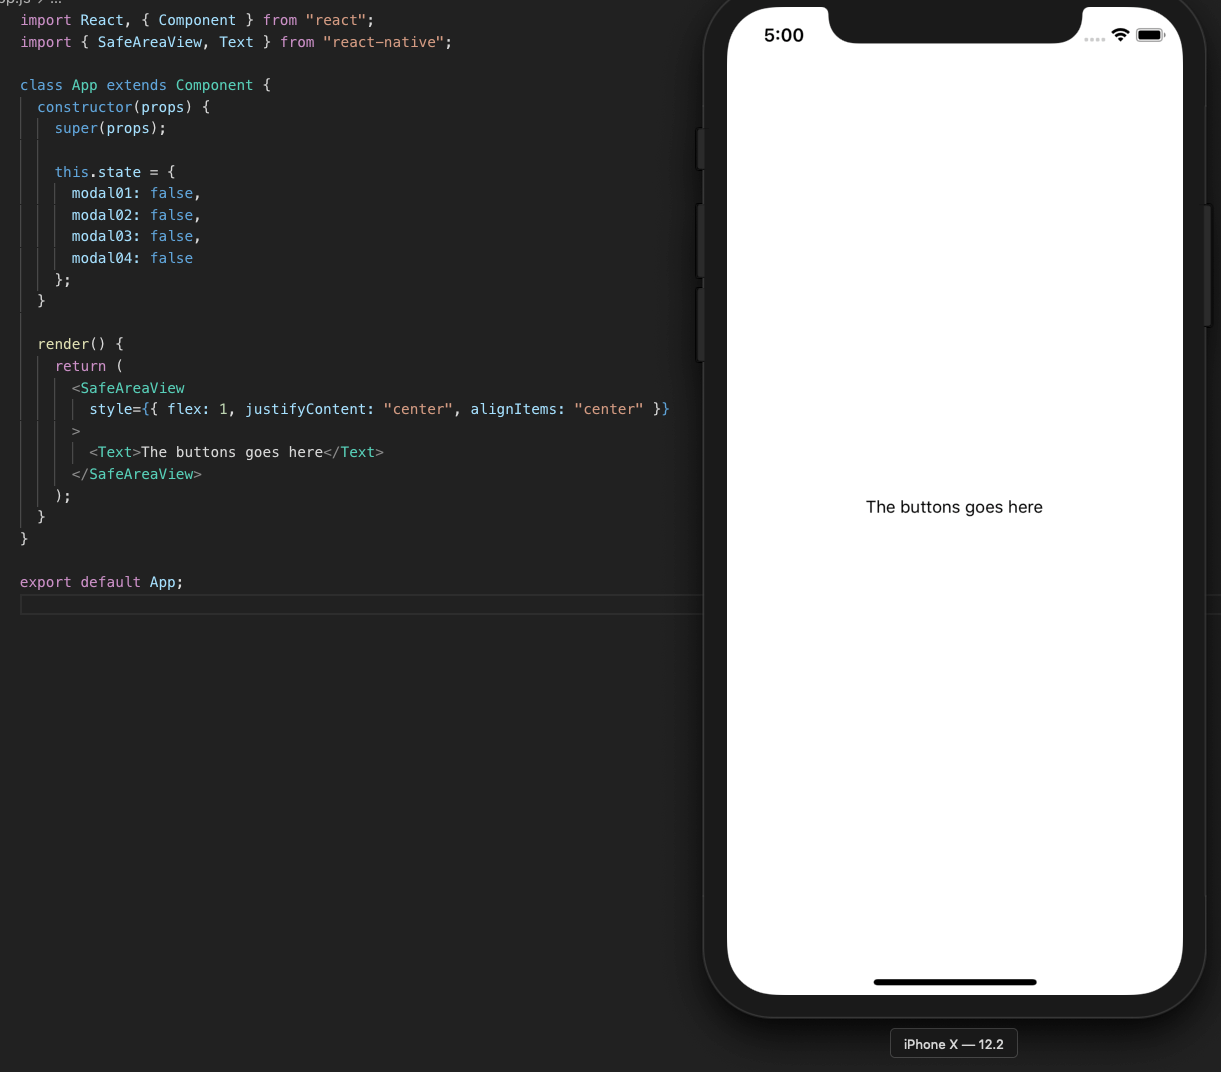
Please Note: On the day this tutorial was written, React Native was on version 0.60. When starting a new project such as this and with the main page of the app acting as a simple component, you’ll need to change it to ‘class’ in order to use the React Native class lifecycle. This allows you to keep creating clean code 😉
Getting back into our tutorial, look at the state with all modals set to false. You’ll now create the modals inside a <Modal/> tag (remember, the code will not be as clean as the example above). Start importing the modal component from ‘react-native-modal’:

We’ll now be opening four modal tags with the settings as described at the beginning of this tutorial.
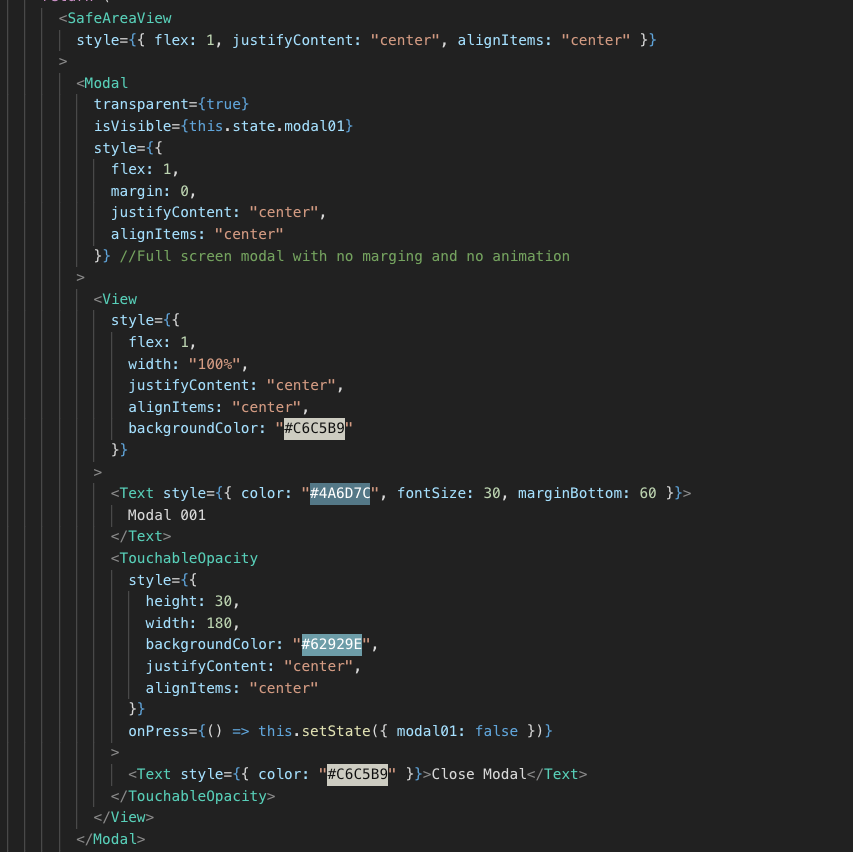
For the first modal, we’ll use ‘flex:1’ to render it on a full screen with no padding for the view inside it. Note: the view inside the modal has a text field to identify itself, as well as a button (‘TouchableOpacity’ works just like a button) to close it. It’s pretty simple to close the modal, just make sure to set its state to ‘false’. When implementing more complex apps, you can use Redux or any state manager to control whether or not your modal should ‘show’ or ‘hide’. Remember, you can use modals to do whatever a normal screen can do.
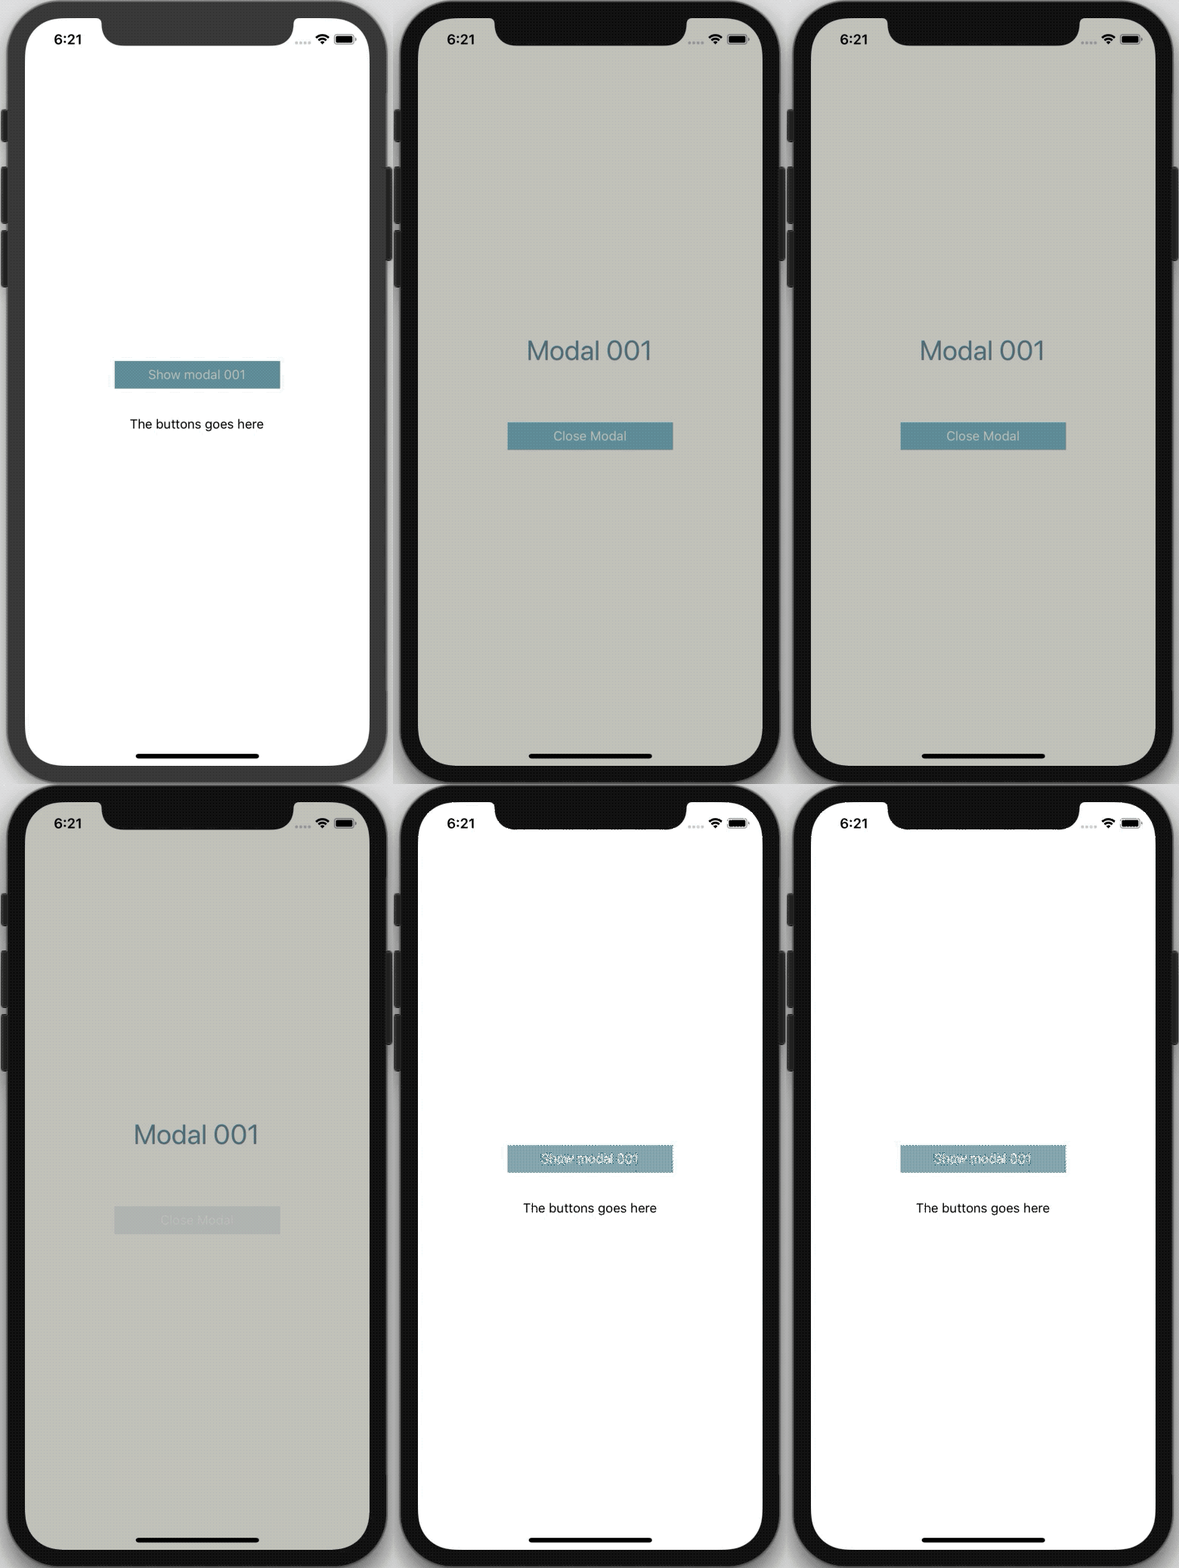
The above modal will behave like so:
We’ll now take the same steps with the other three modals but will add some slight tweaks.
Modals two and three will work in a very similar fashion, however, modal three will also incorporate a slide animation from left to right:
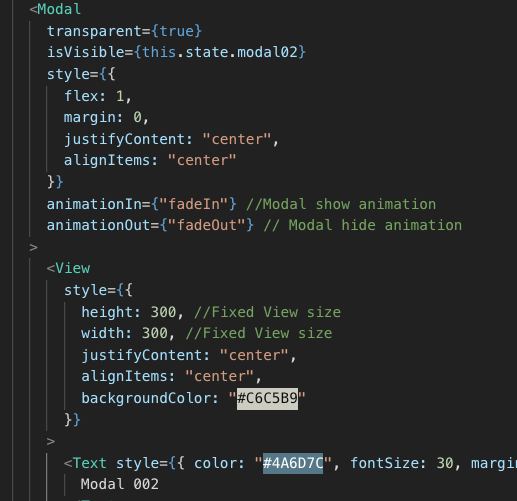
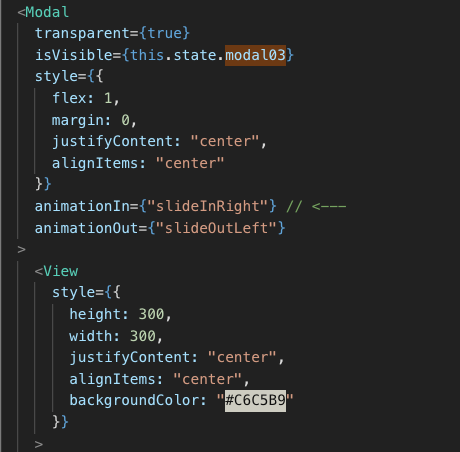
Just for fun, here’s how modal four should look:
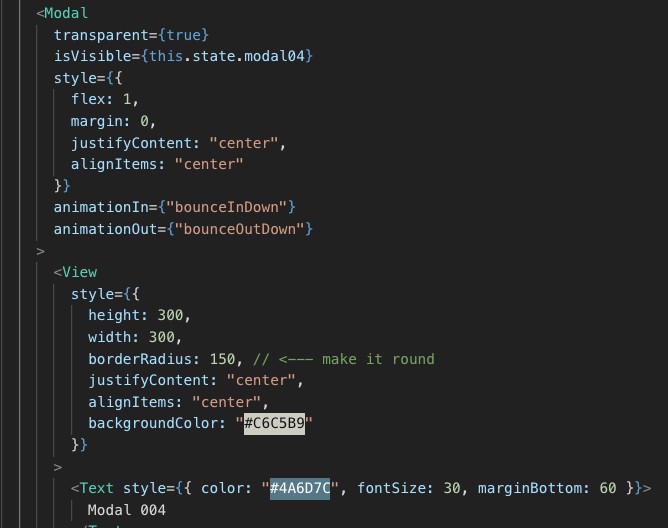
To finish this tutorial, you’ll need the buttons you’ve created to show each modal individually:
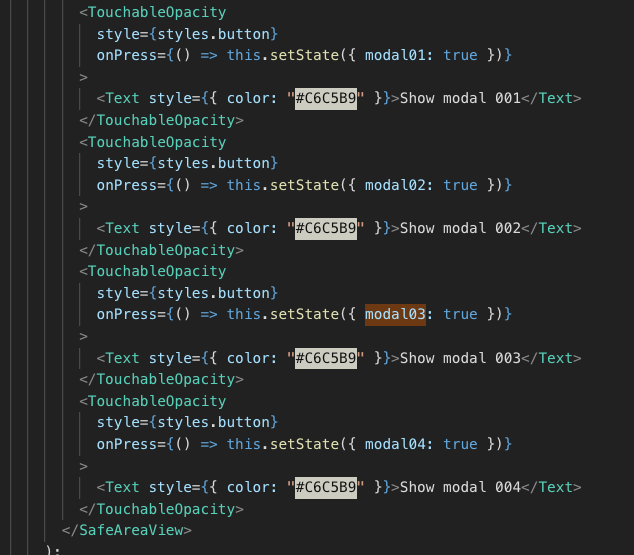
Note that modal tags won’t interfere with any screen rendering unless you choose to show this.
Let’s see our final app in action:
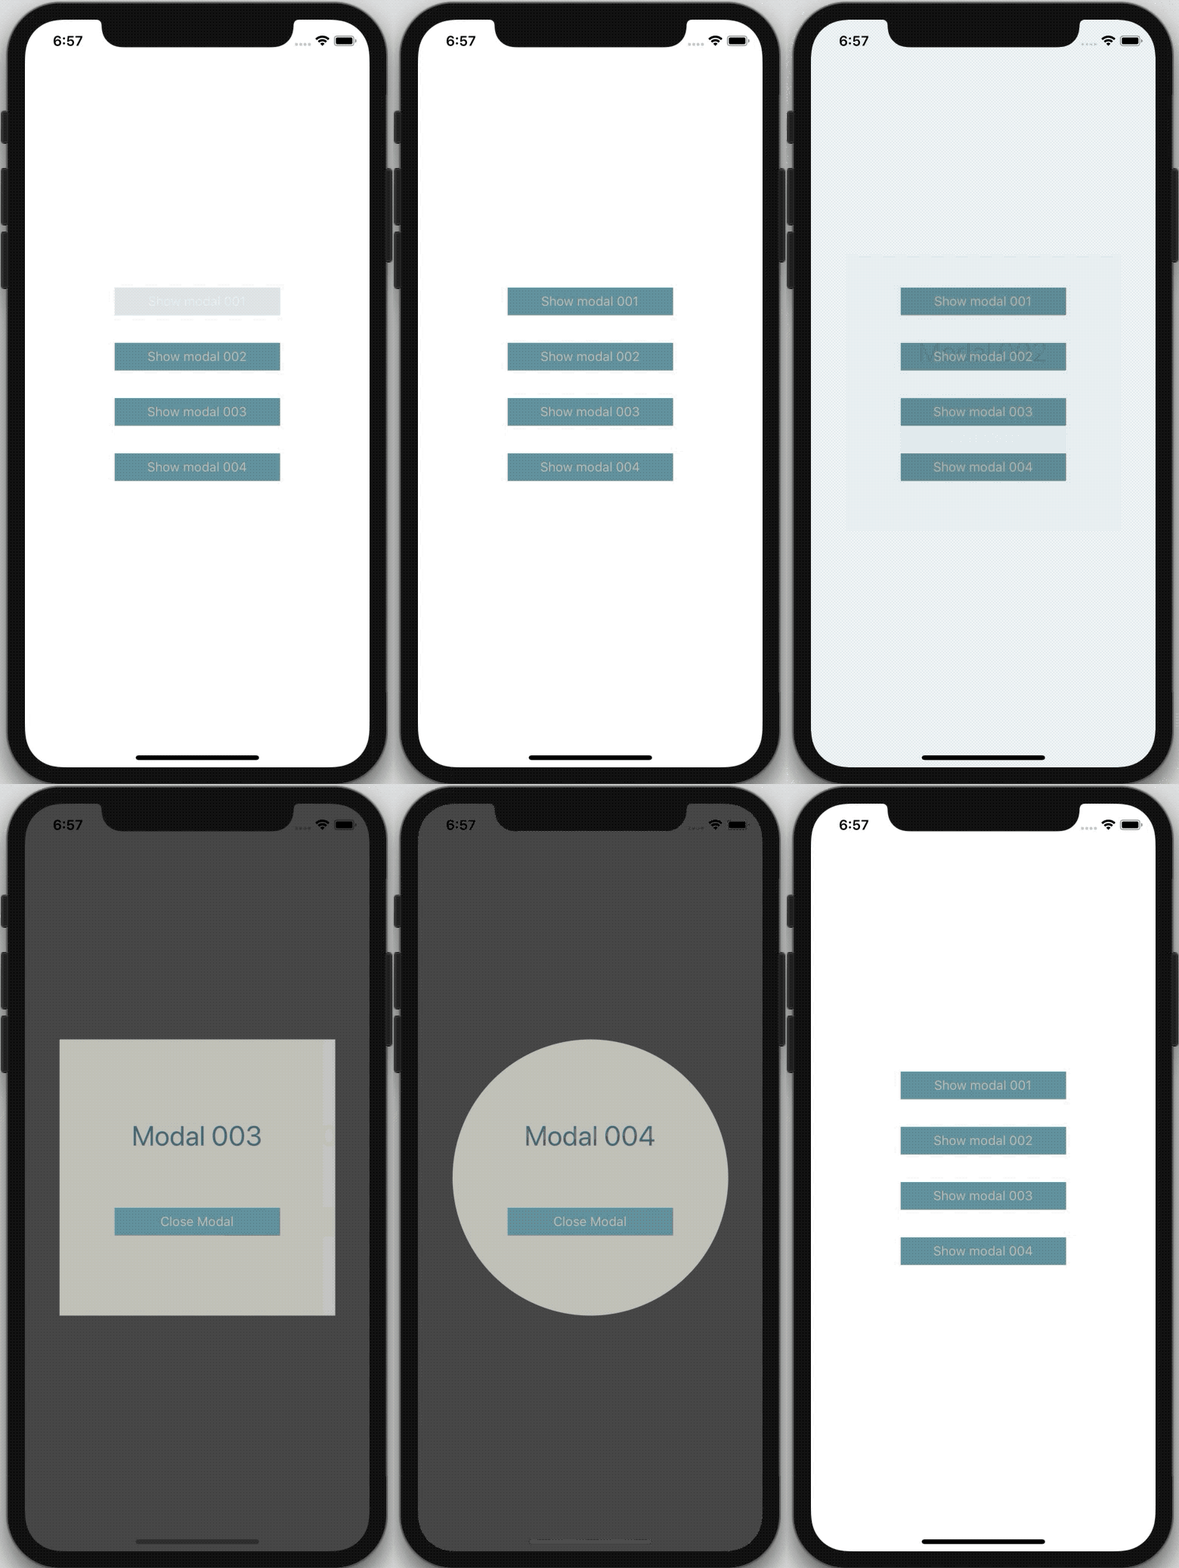
Make sure to explore the modal documentation for React Native. You’ll be able to play around and find lots of different options and experiment with multiple modals. You can check out the full code for this tutorial here.


